Important note:
It is possible to use any of Graflex Vintage Chassis into the 89 Graflex by performing some simple modifications to the inner core. Check instructions below for more information.
Variant 1:
A simple to install and budget all.in.one chassis, mainly dedicated to secure the electronic.


⇒ All.In.One chassis
MultiBoards: graflex-89sabers-padawan-var1-lightsaber-chassis
ProffieBoard: graflex-89sabers-padawan-var1-proffie
CFX: graflex-89sabers-padawan-var1-cfx
⇒ Sounboard Cover (optional): graflex-89sabers-padawan-cover-optional
Variant 2:
Simple chassis with a removable battery holder slot (Keystone 18650 holder)


⇒ All.In.One chassis
MultiBoards: graflex-89sabers-padawan-var2-lightsaber-chassis
ProffieBoard: graflex-89sabers-padawan-var2-proffie
CFX: graflex-89sabers-padawan-var2-cfx
⇒ Sounboard Cover (optional): graflex-89sabers-padawan-cover-optional
ECO Chassis:
⇒ ECO Var1: goth-3d-89sabers-graflex-variant-1-fdm-eco-chassis
⇒ ECO Var2: goth-3d-89sabers-graflex-variant-2-
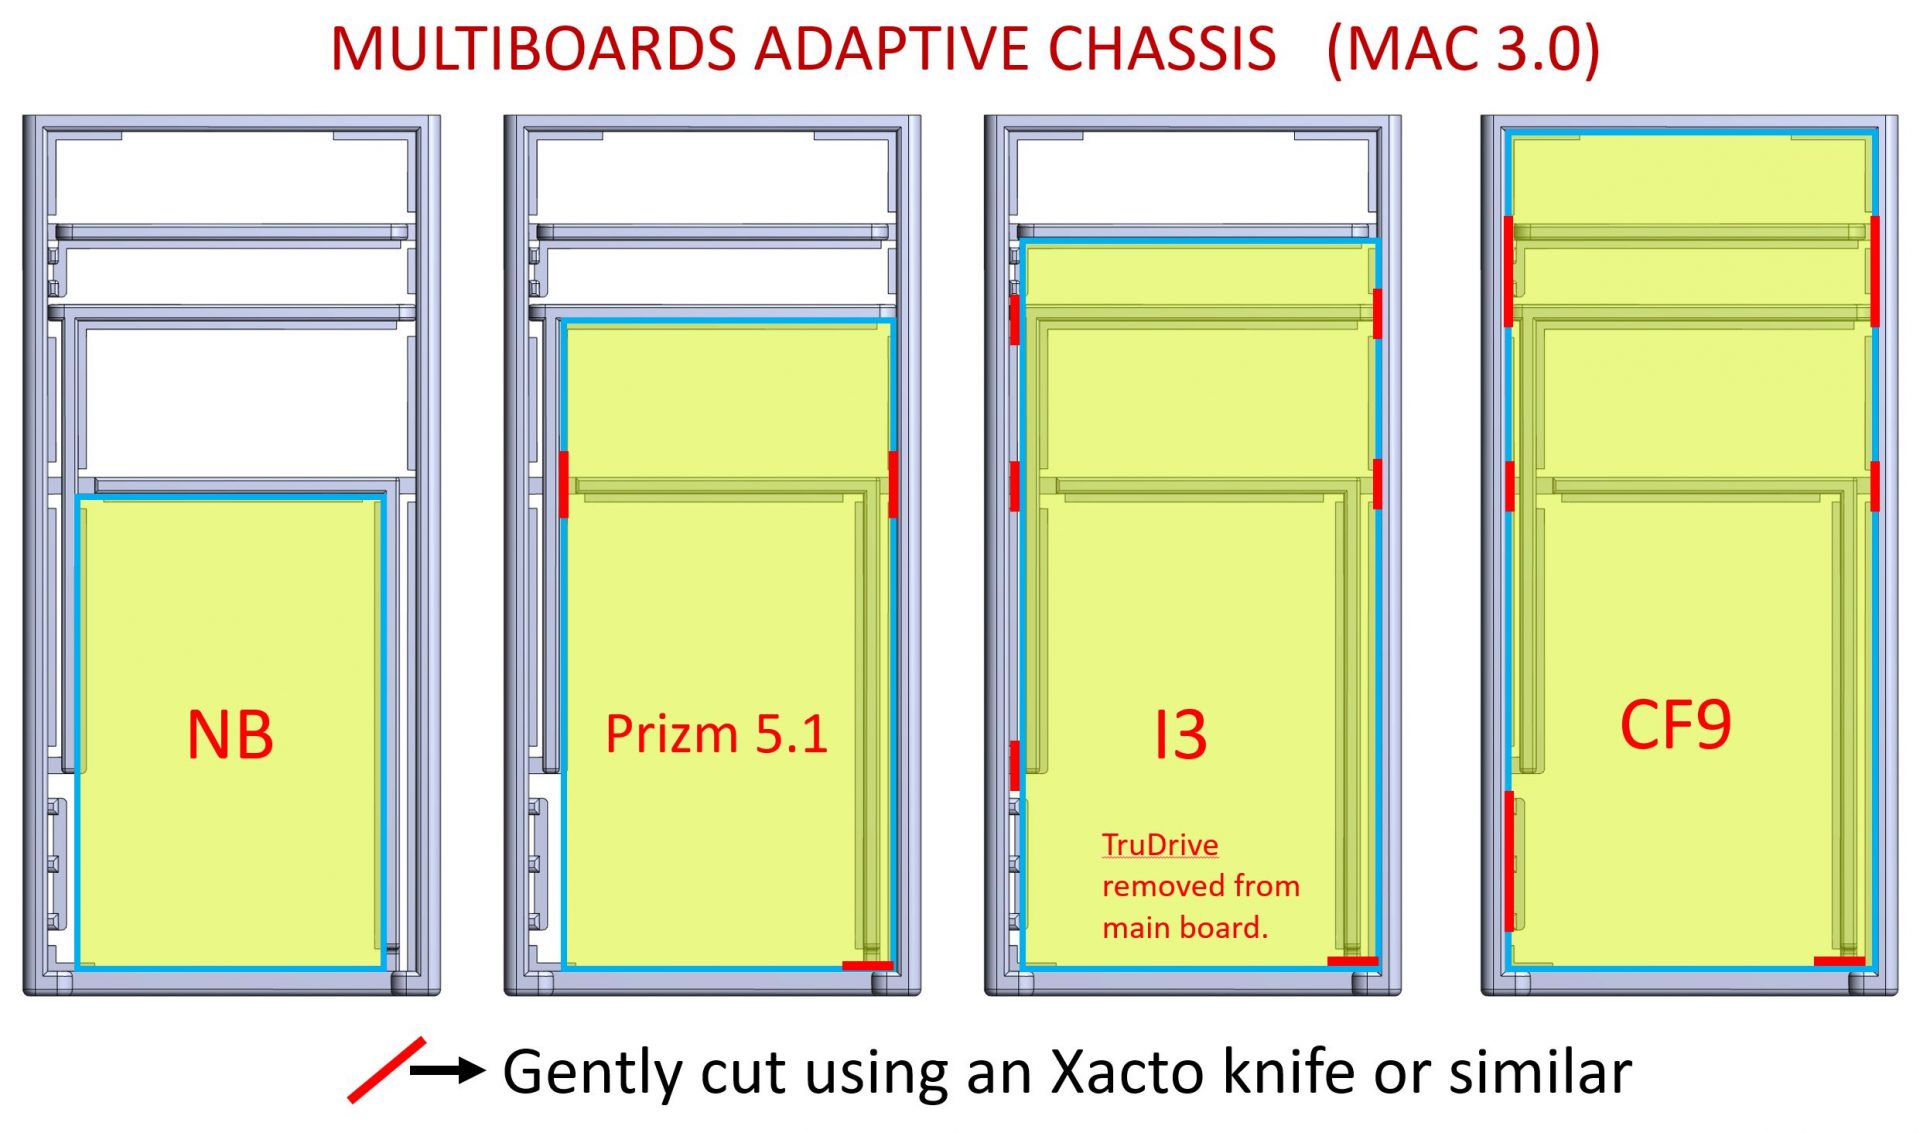
MutliBoards Adaptive Chassis
Soundboards are installed with the SD card facing down.
Adapters for ProffieBoard are also available.
Hilt modification for Vintage Chassis install.
To make this mod easier, purchase the drill template here.

Unscrew the lip, and all other screws, brass pins, …

Remove the blade holder by sliding it down.

Unscrew the bottom blade holder part, it will not be used anymore.
Then unscrew the slide switch PCB and set it aside for later use.

Using a Dremel, cut the thread area away from the blade holder, as shown below (to be down slowly/carefully in order to keep the remaining area flat).


Sand the bottom if necessary to have the bottom as flat and smooth as possible.

Use the drill template to locate exactly where to drill and tap two 4-40 threaded holes.
In order to align the chassis perfectly with the Graflex hilt, make one of the hole face the red button wires channel, then mark the two other holes.


We start with a small drill bit and a drill press (Dremel) in order to pre-drill the two holes, and then double check the correct alignement with the template again.


Then we use the 4-40 drill bit to obtain the correct hole size. Make sure both holes have the same depth to easy the threaded rods length calculation.


Tap the holes. To be done slowly, without too much force and with repeatedly extracting material by unscrewing the bit.


Check that the 4-40 threaded rods screw in perfectly.

Install the slide switch PCB back.

The Vintage/ Replica chassis can now be installed normally.
